

As I write this blog, I sometimes forget just how much I struggled as I learned this program called EnRoute. Back then I was new to vectors too as I had never owned any kind of plotter or router to that point. I remember struggling through the manual and not having much luck - no matter how hard I tried. But believe me - if I can get it, just about anyone can. Computer literate is something I cannot claim rightfully but I have found through my teaching that sometimes the way I explain things makes sense to those who think like me. Forgive me if I don't call he buttons and controls by their rightful name. I've never read the manual as of yet, but rather learned by simply doing.
Let's start with a relatively simple file... a wood grained panel with a raised border and a beveled letter with a second bitmap on it alone. Perhaps not that simple... but if you get this much more is suddenly possible. Here we go...
I created a 6" x 6" x 1" thick plate. This represents the size of material I will route my final piece from. Inside this box I created vectors of a box and the small letter 'a'. I then created an outline around the 'a' with a value of 0.2". This was all done in EnRoute using the draw tools. It could have been just as easily created in Illustrator or Corel Draw or any other vector drawing program. If it was done outside of EnRoute it will need to be imported as an AI file.

Then, after selecting the outside vector square only I created a base relief. This was done using the create relief tool that button looks like a loaf of bread. It was made 0.4" thick.

Then I imported a woodgrain bitmap. The one I used is the sandblasted woodgrain from my Texture Magic collection. When EnRoute opens the bitmaps, by default, they are as big as the plate. That means in this case it is far too small to be able to route decent woodgrain with the size bit ( 1/8" ) I will be using. So this means it needs to be enlarged significantly. This 8.5" x 11" 300 DPI file could be enlarged to create believable woodgrain on a 48" x 96" sheet of material without difficulty.

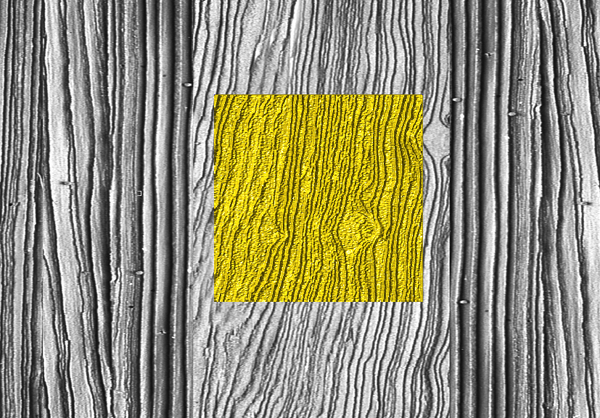
I selected the woodgrain bitmap all by itself and then by grabbing the corner nodes stretched it out until the square vectors were inside one of he different grain boards.

Up close it looked like this...

Then after selecting both the relief and the bitmap I selected the apply bitmap menu. It looks like a mountain and sky. I applied a value of 0.2" in the table and selected add to relief, then hit enter. This means the black areas of the bitmap did nothing. The white raised 0.2" and the grays (depending on their value) did something in between. Just like magic the wood grain appears when you hit the render button (lightbulb).
Get rid of the wood grain bitmap for you won't need it any more... then render the file one last time to check things. The relief should look like this now.

Now it gets a teeny bit more complicated. The secret is to do things in the right order - or else they may not turn out quite like we imagined. Select the border of the letter alone. Open the create relief menu... and then add relief box... then type in a value of 0.7" Create this flat relief. The reason for the value is as follows... the original relief was 0.4" add on the 0.2" wood grain... and then add on 0.1" for this border.

Everything looks great at this point but if you were to tool path and route the file as it is now some funny things would happen. The reason is you have two different surfaces in the same space. So we need to merge things together before we go further. Deselect everything, then open the merge menu. This button looks like two mountains being pushed together. Select MERGE HIGHEST... then the base relief (outside square) it will turn blue. The red box is your plate and will not affect anything.

Then press the arrow key. Then select the second relief (in this case it is the letter outline. It will turn red. Then press the green check mark. That is how simple merging is but you are not quite done. Delete the outline of the letter and then check the render. If you did it right the background relief will now have the letter outline merged to it.

Now we are going to add to this relief. Select the base relief and the letter 'a' vector. Then open the create relief menu (it looks like a loaf of bread) I select the bevel tool, ADD to relief. I put in a value of 0.1" to the base. This means the sides of the letter will be 0.1" tall before they angle to form a bevel. I also put in a value of 21 degrees for the slope of the top. I used a fixed height of 0.15" I know from experience this will look fine. Hit the enter key to make it happen.

When you hit the lightbulb (render) button it should look like this. I'm happy with this but I want to add a little different texture to just the letter.

So to add the subtle texture I want by importing another bitmap from my TEXTURE MAGIC collection called splotches. Like I did with the woodgrain texture, I enlarged it much larger than the file I was creating... then selected the base relief, the letter vector and the bitmap. Once the texture button was lit I opened the menu and added the texture to the relief, but this time entered a value of only 0.1" This would make for a much subtler texture that was suitable for this purpose.

Once I created the texture I deleted the bitmap and the letter 'a' vector. It is not needed anymore. Check one last time with a render. (lightbulb button) Now you will have to make sure it fits within your plate vertically before you tool path and route it.

My advise is to build a half dozen of these type of files to get yourself familiar with the process. Paint them up too as that is also good practice. In my case I created all the letters of the alphabet - each styled differently and with a variety of textures too. After twenty six different files I had This process down to a science. I also had twenty six marvelous samples hanging on my wall that serve me well to this day as handy selling tools.
I routed all my sample pieces from 30 lb Precision Board. It's my material of choice. It routed beautifully and is well able to weather lots of touching - which your samples are bound to get.
So there you go. Try it out and see if I have explained it better than the manual does. Let me know if I have explained something in a way only I can understand... :)
-dan